
Your home’s exterior is what creates the first impression of your home. Is it a good one, with a beautiful front door that compliments your home’s appearance, or does it create a poor impression with peeling paint, a standard slab door or other aspects that don’t contribute to your home’s appearance? What if it’s drafty or you don’t feel it provides sufficient security? Fortunately, replacing an exterior door is a relatively simple and straightforward process. Here’s how to pick the right door and install it correctly the first time.
With a little planning, your exterior door can be replaced at any point during the year. In the extreme temperatures of winter and summer, set up an airlock with a couple pieces of heavy plastic sheeting on a day with moderate temperatures. This simple addition can make the process less of an inconvenience for your household.
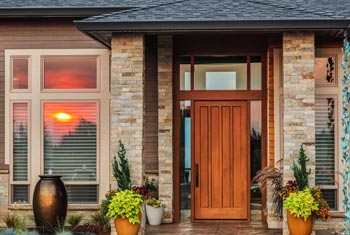
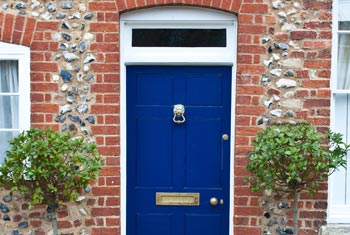 What kind of door should you replace your existing one with? Steel doors provide superior security, and are available with a wide range of lite or window options, including wrought iron grilles that help enhance both your home’s security and beauty. Wood and fiberglass doors don’t transfer cold as readily as steel. Wood has its own innate beauty, but will require more maintenance than fiberglass. Though fiberglass is a non-organic material, it can be obtained in a woodgrain finish that can be stained to almost perfectly mimic fine wood finishes. Any of these types of doors are available in insulated formats with double-paned insulated glass lites, providing superior energy efficiency. Outdated molding can be replaced at the same time with very little extra work.
Replacing an Exterior Door
1. Start by carefully removing the interior trim using a pry bar. Measure your existing door and frame for height, width and depth, then determine the swing by standing in front of the door and determining whether you would use your right or left hand to work the latch. Find a door that matches your specifications.
2. Once you have the door, go over the manufacturer’s installation instructions before you get started. Carefully remove your exterior trim around the door and any insulation around the door. If you will be reusing it, store it carefully to minimize damage during installation.
 3. Remove the hinge pins from the existing door to remove it from the doorway, placing a small screwdriver or nail set against the bottom of the hinge pin and striking it lightly with a hammer until the hinge pin comes loose. Remove the other side of the hinge from the doorframe.
4. Remove all screws, nails or other fasteners attaching the door frame to the house, cutting them with a reciprocating saw if needed. Remove all wood shims if possible, which resemble small wedges. Remove the door frame from the house framing, using a prybar as needed.
5. Now it’s time to install the new door. Dryfit it into the opening to ensure fit, then remove it. Check the framing surrounding the door for insect damage or rot and determine whether your subsill and new door is square and level to the rest of the framing, adjusting it as needed with shims.
6. Check that the new door will clear the existing interior flooring, raising it with blocks of treated wood if needed to achieve clearance. Weatherproof the subsill by applying exterior-grade caulk in a zig-zag pattern across the installation, staying an inch from the front and rear of the subsill, then caulk the underside of the door sill.
7. Tip the door into place from the outside, starting at the bottom. Place temporary shims at the top of the frame to hold it in place, then use shims to adjust the frame into a plumb and square position. Drive screws through the hinges and shims, then trim all shims flush to the framing.
 8. Move to the latch side and install any needed shims to keep the frame secure in the doorway, then drive screws near the top and bottom of the jamb. Adjust the door as needed to ensure even placement within the wall cavity, being sure to place additional shims at the lockset position to provide better security.
9. Remove any remaining shipping braces. Check the swing again and add additional screws to the door frame. Secure the sill per the manufacturer’s instructions and use caulk or a minimally expanding spray foam to seal air gaps, then install the door trim. If it isn’t pre-finished, finish it and enjoy your home’s beautiful new exterior.
When you replace the exterior door to your home, you can quickly add curb appeal, improve your energy efficiency, improve security or bring more natural light into your home, all with an afternoon’s work. If you’re not certain what the best type of door is for your home, we’re here to help. Please feel free to contact Poulin Lumber’s experienced associates to help find the perfect solution for your project.